|
|
||||||||||
 |

|
Rail Building Three-way junctions are good when you have a branch line breaking off the main line. But what if you've got another branch line nearby? It can often be more efficient to build a four-way junction for all of these. This page provides some example four-way junctions and details on when to use them. You may also wish to reference the Rail Junctions section of this site for more inspiration.
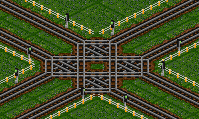
This type of junction is pretty awful, really. Try not to use them if possible. Pros:
Cons:
This junction is arguably an improvement on the basic 4-way junction, but can easily get clogged up and cause problems. Pros:
Cons:
Cloverleaf The cloverleaf is the bigger brother of the half-cloverleaf. It can handle substantial amounts of traffic well, although it's important to note that the size of the cloverleaf in this picture has been reduced. It's best you make it so your longest train can fit completely into one of the turning tracks without blocking the main line behind it. See some of the junctions on the Double Track Cross Junctions page for more examples. Note also that tunnels are used instead of bridges, as trains have to slow down to the maximum speed of the bridge, whereas tunnels have no speed limit. This is a good junction in the respect that it has a high capacity, but it's not so useful for hilly or cluttered areas due to the large amount of space required. Pros:
Cons:
Pros:
Cons:
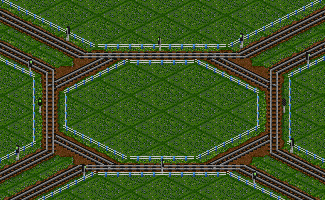
Unlike the spaghetti or cloverleaf junctions above, the tracks on the CRAB split before they merge so a trains are less likely to encounter a red signal. Also, it does not give preference towards any track so it is great for where there are many trains coming from and going to all directions. With a simple roundabout, there is only one looping track while with the complex version there are three. They each start in the centre and work their way outwards. Trains heading North East (where North is the top of the picture) from South East will go to the inside track. This then joins with the South West to North West track and becomes the middle track. Then finally it becomes the outside line after joining the North West to North East line and leaves the junction. You can also use the CRAB on two-track lines, that is, a line with two tracks going up and two tracks going down. To see an example of this, click here. Although it appears complex, it is one of the most efficient anywhere-to-anywhere 4-way 4-track junctions you're likely to find. If you know of a better one, don't hesitate to tell me and the world about it. Pros:
Cons:
Don't forget to check out the Rail Junctions section for many more examples of junctions!
|
 Basic Four-Way Junction
 Roundabout